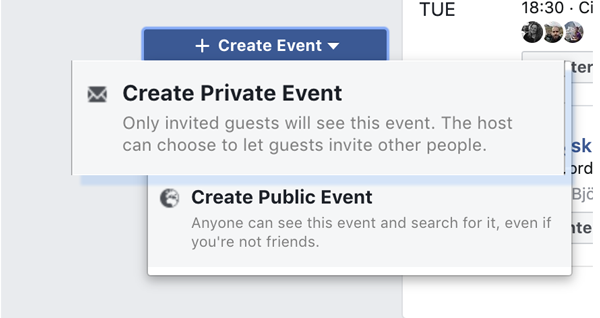
Create a Private Facebook event
This option is great if you only want to invite your close friends or would like to keep the event a secret. To create a Private event:
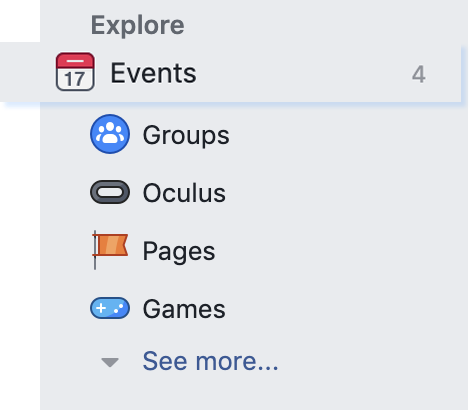
- Go to Facebook
- Click “Events” on the left-hand side
- Click “Create event” and pick the “Create Private Event” option
- You can pick a stock event image or upload your own event picture
- Choose an event name
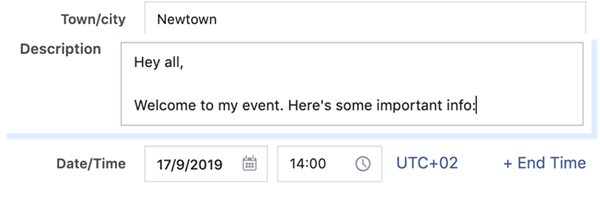
- Pick the event location
- Write a description for your event and keep it short. If you have some important information, always include it at the top of the description box. (Not everyone reads the entire description.)
- Choose the start and the end date for your event
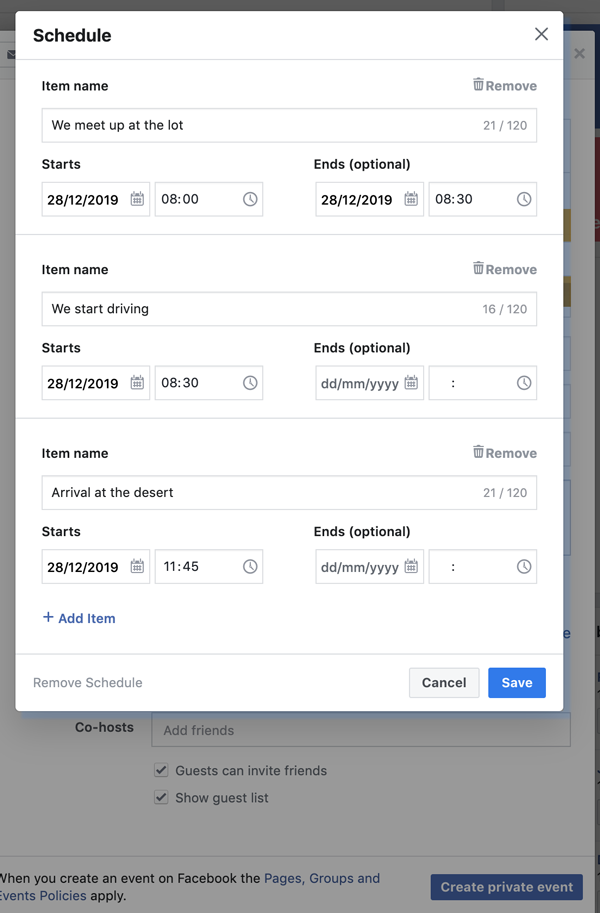
- If you have a schedule for your event with activities broken down into timed chunks, you can add a “Schedule”. You can then pick the time for each activity and write a little description.
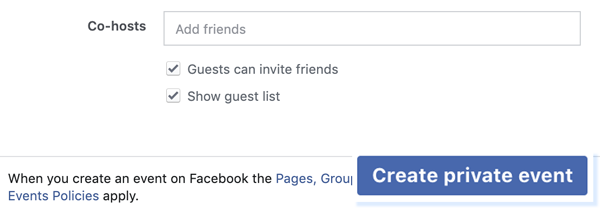
- You should be all done! Just click “Create private event” and you’re ready to go.


When you publish a private event, you’re the only one who can see it. You can now “Invite” your friends to attend the event or “Edit” the event.
Create a Public Facebook event
You can organise a Public event as yourself or on behalf of a Facebook Page you manage.
We strongly recommend the second option. This will let you add an event category, create repeat events, and link directly to tickets from Facebook. (If you don’t already have a Facebook page for the event / organiser, you can create one by following this guide.)
- Go to Facebook
- Click “Events” on the left-hand side
- Click “Create event” and pick the “Create Public Event” option
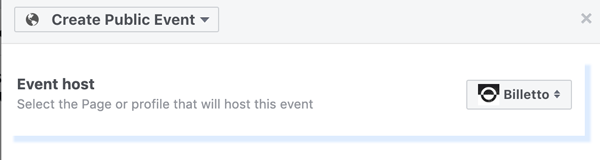
- You can now select who’s hosting the event. You can choose your personal Facebook profile or a page that you manage.
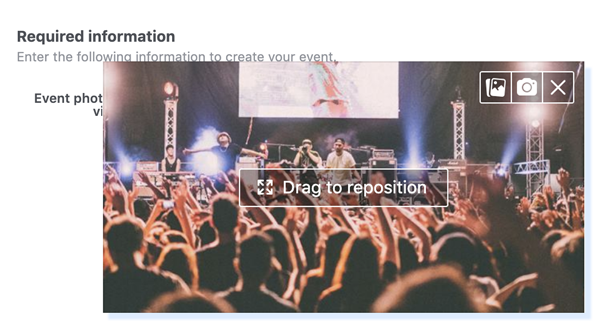
- Next, choose the image for your event. You can choose from your profile photos / photos from the page you manage, or upload a new image for the event. You can also add a video - it works very well to grab attention on Facebook newsfeeds.
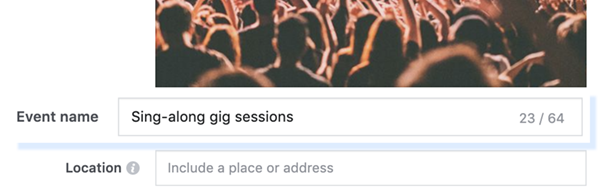
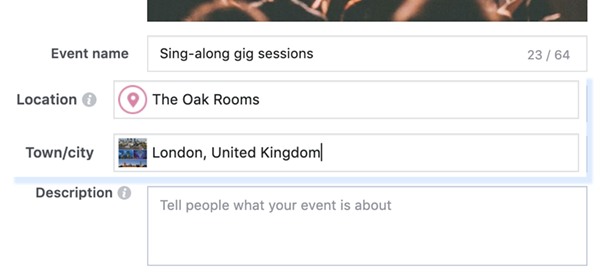
- Pick a name for your event
- Choose the location for your event. Make sure to get the address right: Attendees will use this address to find your event on the day.
- Write a description for your event. Stay concise. If you have any must-know information, try to include it at the start of the description.
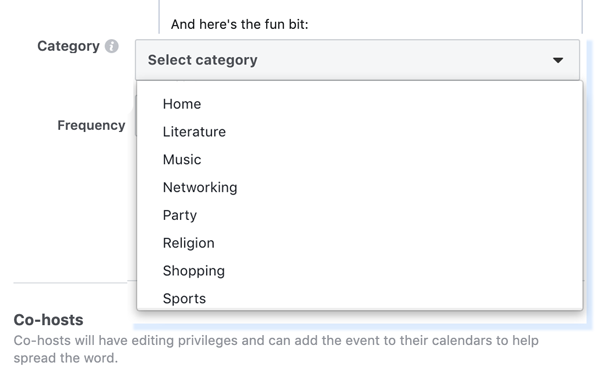
- Select a category for your event. This step is important, as it will help attendees discover your event via Facebook recommendations.
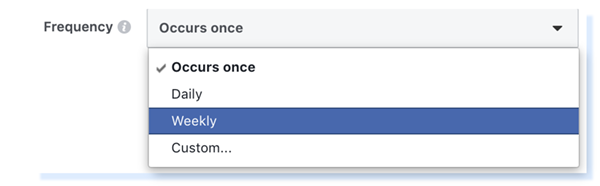
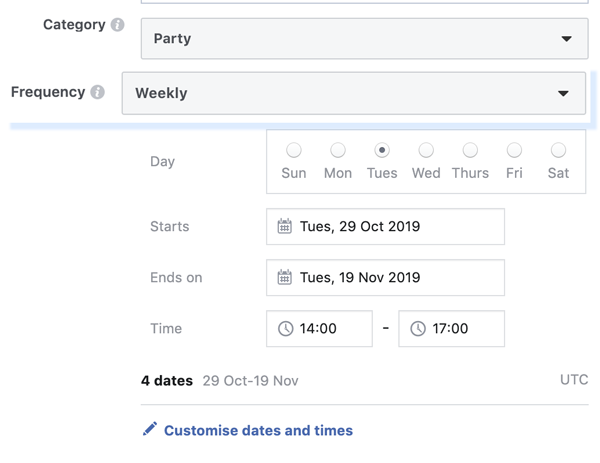
- If your event repeats regularly (e.g. once a month/week), you can set up extra time slots in “Frequency”. Just pick the date(s) and time(s) for the repeat events. Facebook will create a separate listing for each event date.
- If another person or page is organising this event with you, you can add them in “Co-hosts”. (They must have a Facebook profile to be able to co-host).
- Next, you can add some keywords to help attendees discover your event on Facebook. Facebook usually suggests the most popular keywords. You can only add three.
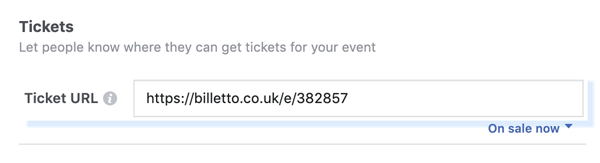
- If you’re selling tickets to your event, you can add a link to the ticket sales page. (If you don’t have a link yet, you can create an event on Billetto in just 5 minutes.)
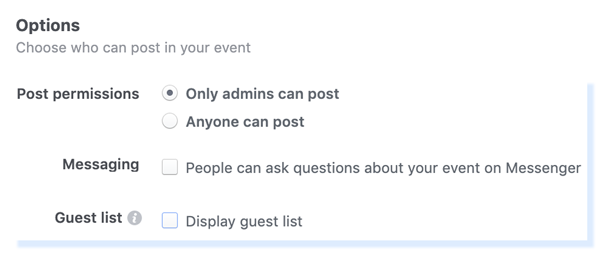
- You can choose how attendees can contact you about the event. (Can they post on the event page or ask questions on Messenger?) You can also choose whether you want to display the guest list or keep it private.
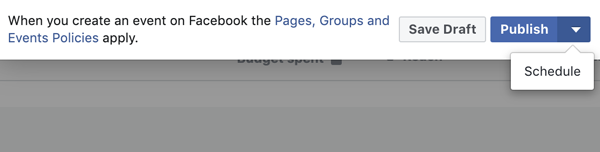
- Finally, you can choose to Save the event as a draft, Create a live event that everyone can find, or Schedule the event to be published later.


When your Facebook event is published, start by inviting your friends or creating a post about it on the event page you manage.
Pro tip: Find local interest groups in your area where you can post about your event, but remember to first ask a group admin if you’re allowed to share a post.
Video
We’ve made a short video to show you just how easy it is to create an event on Facebook: